
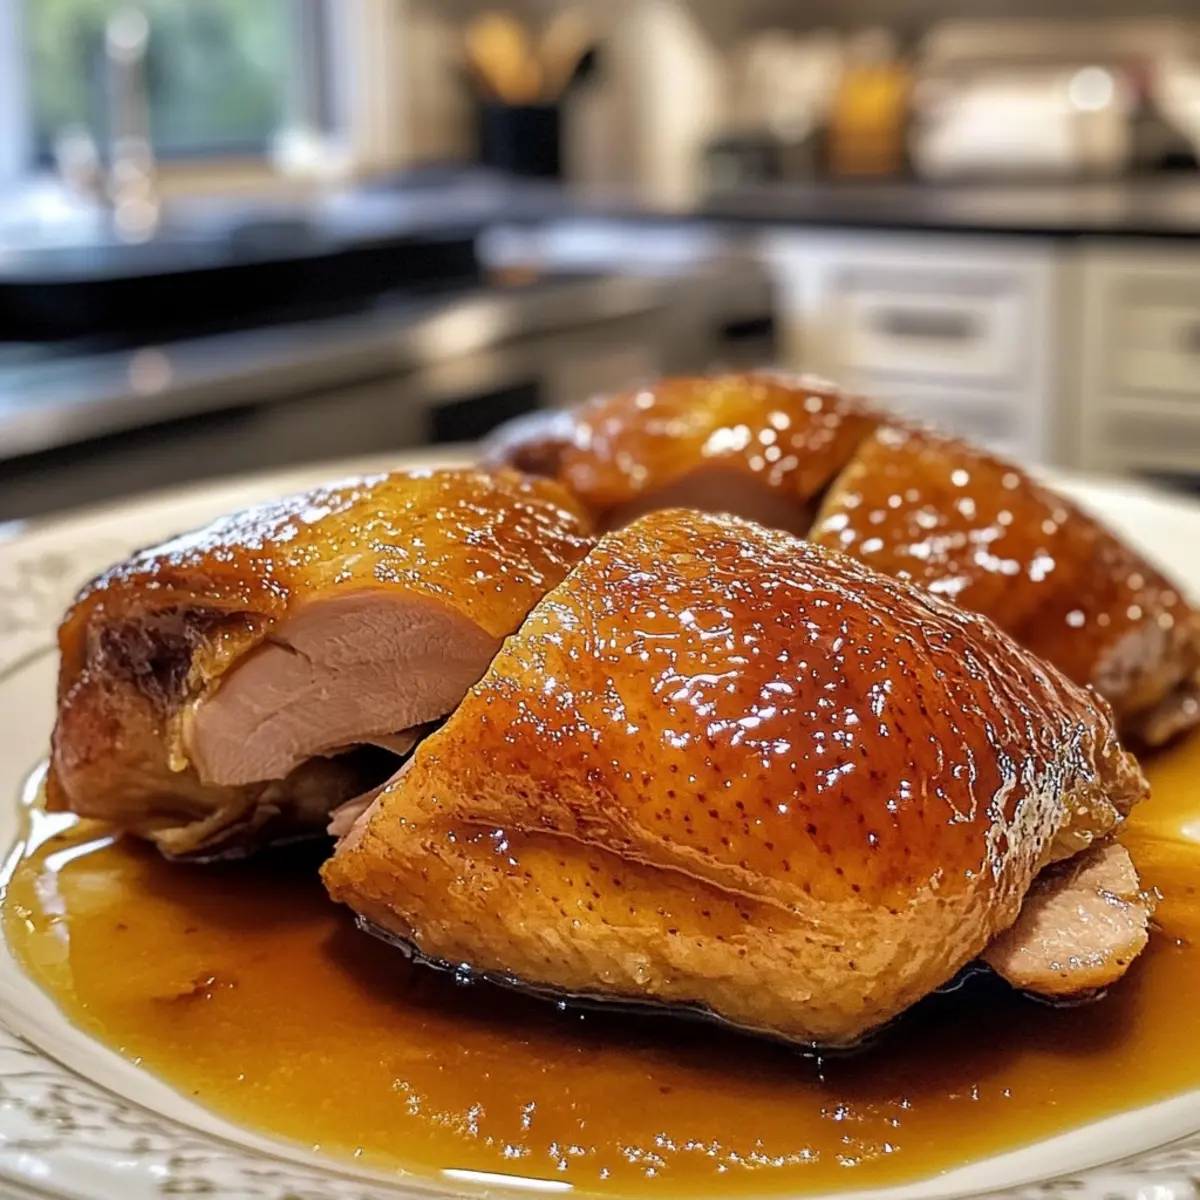
There’s something undeniably enchanting about the intoxicating aroma of Honey Roasted Duck wafting through the kitchen, transforming an ordinary evening into a culinary celebration. As I stood there, preparing for a cozy gathering with friends, I couldn’t help but reminisce about the first time I tasted this glorious dish—its honey glaze perfectly balancing the savory richness of the duck.
This recipe isn’t just for the professionals tucked away in high-end restaurants; it’s a delightful creation you can whip up right in your home. Imagine sinking your teeth into that crispy skin, giving way to tender, juicy meat—the ideal centerpiece for any special occasion. Whether it’s a festive dinner or a simply elegant weeknight meal, this Honey Roasted Duck will surely impress and leave your guests singing its praises. Ready to bring a touch of gourmet indulgence to your table? Let’s dive into this easy recipe that will have everyone asking for seconds!
Why is Honey Roast Duck so special?
Irresistible Aroma: The rich scent fills your kitchen, inviting everyone to gather around the table.
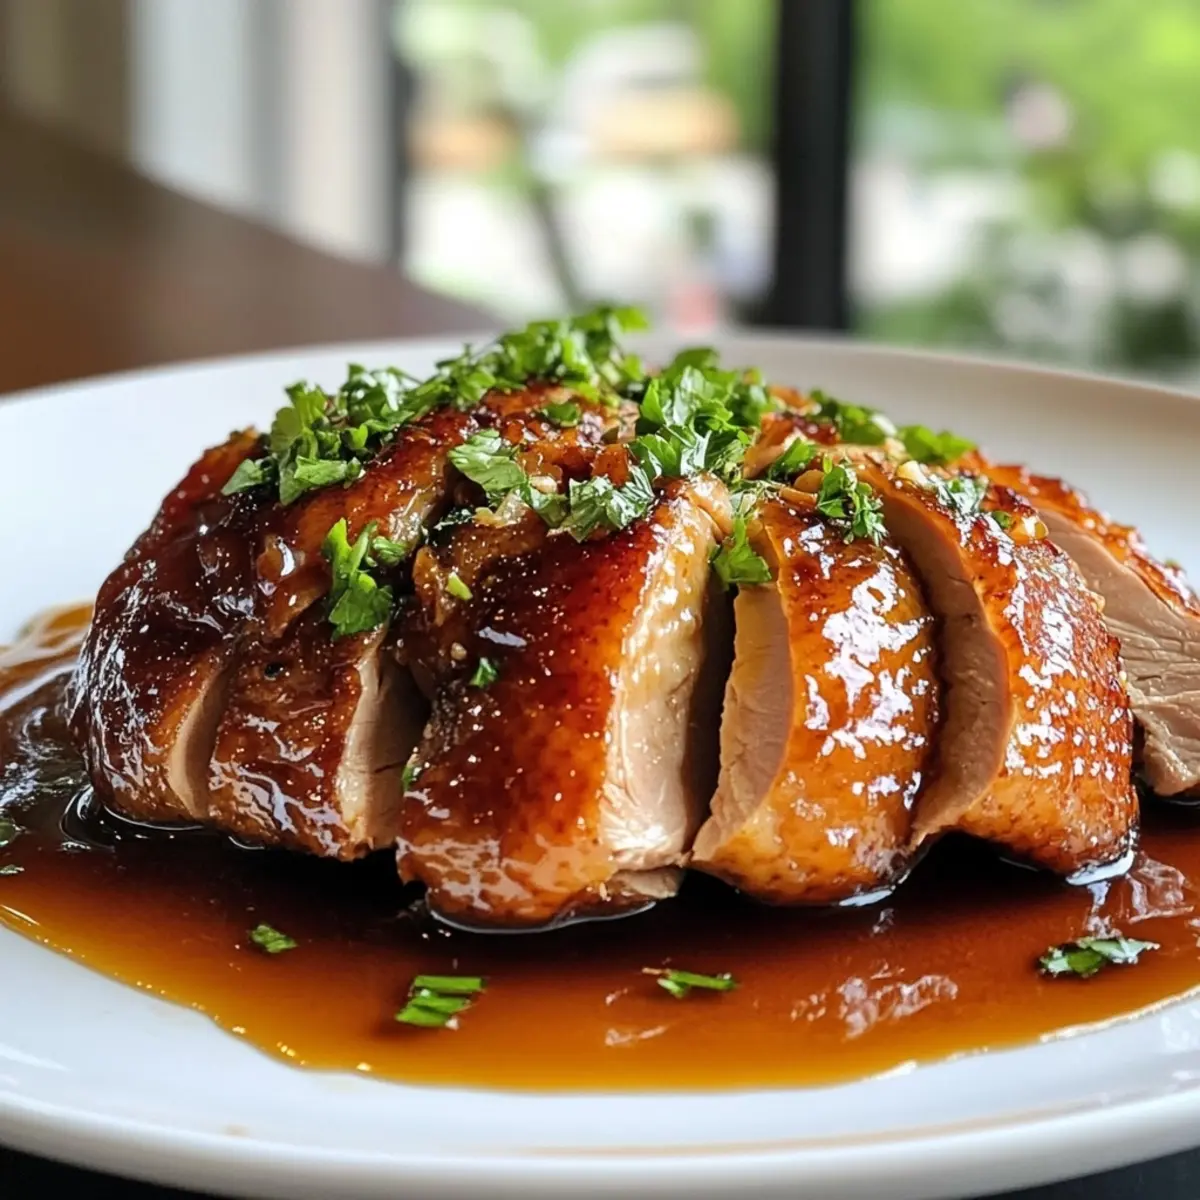
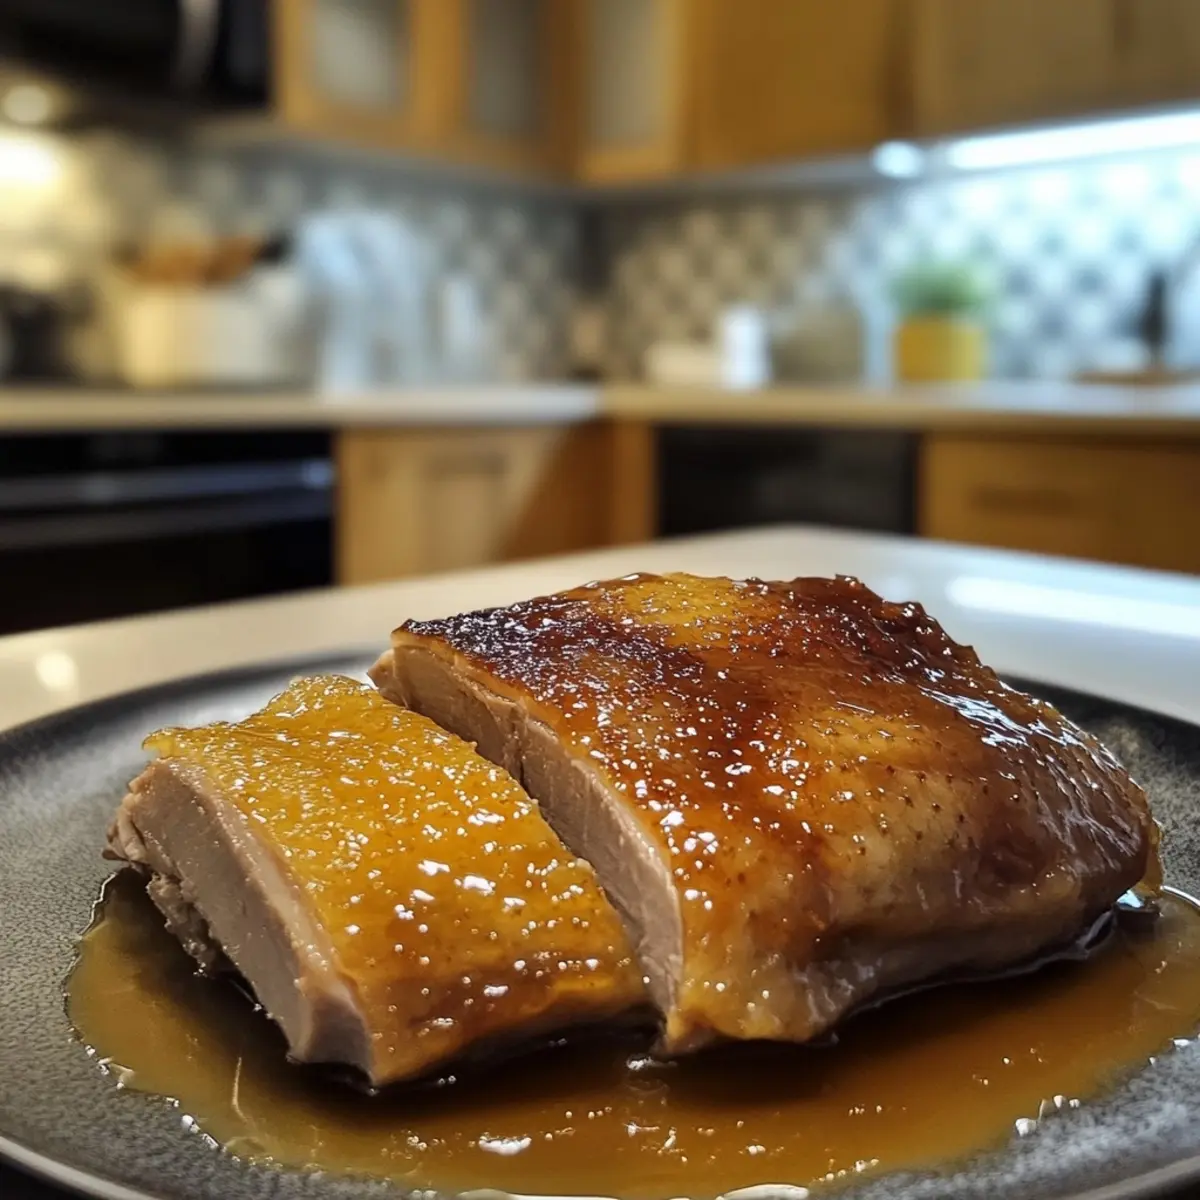
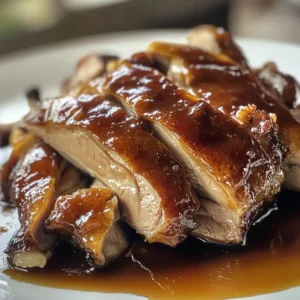
Crispy Skin: Achieving that perfect golden-brown skin creates a delightful crunch that contrasts beautifully with the tender meat.
Sweet and Savory: The honey glaze enhances the duck’s natural flavors, creating a mouthwatering experience every time.
Versatile Occasions: Perfect for holiday feasts or casual dinners, this dish impresses for every occasion.
Easy Recipe: With just a few simple techniques, you can master this gourmet meal at home and make moments memorable. If you’re in the mood for something sweet and savory, you could also check out our delightful Honey Banana Grilled cheese recipe!
Honey Roast Duck Ingredients
• Here’s what you need to create your delicious Honey Roast Duck.
For the Duck
- Duck (Pekin variety, 5-6 pounds) – The star of the dish, this duck is perfect for roasting with tender meat and a nice layer of fat.
For the Glaze
- Honey – A natural sweetener that creates a glossy finish; maple syrup can be used for a unique twist.
For Flavor Depth
- Garlic Cloves – Enhances aroma and flavor; shallots can serve as a milder replacement if needed.
- Quartered Orange – Adds a fresh citrus note and moisture; feel free to use lemon for a zingier flavor.
- Fresh Rosemary – An aromatic herb that elevates the dish; dried rosemary can be substituted if fresh is unavailable.
For the Spice Mixture
- Paprika – Adds warmth and beautiful color to the skin.
- Salt – Essential for bringing out all the flavors.
- Pepper – A dash adds just the right amount of heat.
- Garlic Powder – Intensifies the garlic flavor without the chunks.
- Dried Rosemary – If you need an alternative to fresh for seasoning.
Using these ingredients, you’re set to create a remarkable Honey Roast Duck that will dazzle your guests and elevate your dining experience!
How to Make Honey Roast Duck
- Prepare the Duck: Remove the duck from refrigeration 30 minutes prior to cooking, allowing it to reach room temperature for evenly cooked meat.
- Preheat the Oven: Heat your oven to 425°F (218°C). This high temperature is critical for that beautiful crispy skin!
- Rinse and Dry: Gently rinse the duck under cold water and pat it dry with paper towels. Ensure the skin is intact for optimal results.
- Score the Skin: Using a sharp knife, score the skin in a diamond pattern. Be careful not to cut into the meat to avoid dryness.
- Prick the Skin: Prick the skin where the legs meet the body to help render the fat, ensuring an even cook and crispiness.
- Stuff the Duck: Stuff the cavity of the duck with garlic cloves, quartered orange, and fresh rosemary. This infuses incredible flavor as it roasts.
- Season the Duck: Rub your spice mixture over the duck, ensuring every nook and cranny is coated for vibrant flavor.
- Tie the Legs: Using butcher’s twine, tie the legs together. This helps the duck cook evenly and maintain its shape.
- Roast Initially: Place the duck in the oven at 425°F for 15 minutes. This starts the crisping process and locks in moisture.
- Lower the Temperature: After 15 minutes, reduce the oven temperature to 350°F (177°C) and roast for an additional 75 minutes, or until tender.
- Baste with Honey: After 1 hour, baste the duck with half the honey, and again with the remaining honey 15 minutes before finishing to achieve a glossy, sweet glaze.
- Check the Temperature: Ensure the internal temperature reaches at least 165°F (74°C). Once done, let it rest for 15 minutes before carving.
Optional: Serve with a sprinkle of fresh herbs for an extra touch of freshness.
Exact quantities are listed in the recipe card below.
Make Ahead Options
These Honey Roasted Duck preparations are perfect for busy home cooks wanting to save time during the week! You can season the duck and score the skin up to 24 hours in advance, ensuring that it’s ready to go when you are. Simply rub the spice mixture onto the duck and refrigerate it overnight. When it’s time to cook, take the duck out of the refrigerator at least 30 minutes prior to roasting to promote even cooking. For delicious results, be sure to baste it with honey as directed. These steps will not only save you valuable cooking time but also ensure your Honey Roasted Duck retains its delightful flavor and crispy skin.
Honey Roast Duck Variations
Customize your Honey Roast Duck to delight your taste buds even more—explore these tempting twists!
- Maple Glaze: Swap honey for maple syrup for a uniquely sweet and earthy flavor profile.
- Citrus Medley: Use lemon and lime instead of orange for a refreshing zing that brightens the dish.
- Herb Infusion: Substitute fresh rosemary with thyme or sage for a distinct herbal note.
- Spicy Kick: Add a sprinkle of cayenne pepper or crushed red pepper flakes to the spice mix for an exciting heat.
- Fruit Stuffing: Experiment with apple or pear slices instead of citrus for a sweet, fruity twist.
- Savory Twist: Try adding a dash of soy sauce or balsamic vinegar to the honey glaze for a deeper flavor complexity.
- Garlic Lovers: Increase the garlic cloves or add roasted garlic into the stuffing for a more intense aroma.
- Sweet and Spicy: Blend honey with a touch of sriracha for a delightful blend of sweetness and heat that adds depth to the dish.
Storage Tips for Honey Roast Duck
- Fridge: Store leftovers in an airtight container in the fridge for up to 3 days, ensuring they retain their delicious flavor and moisture.
- Freezer: For longer storage, freeze the duck in a freezer-safe container or wrap it tightly in plastic wrap for up to 2 months.
- Reheating: To enjoy your Honey Roast Duck again, reheat it in the oven at 350°F (177°C) until warmed through, helping to preserve that irresistible crispy skin.
- Airtight Guidance: Always make sure your containers are sealed properly to keep out freezer burn and maintain the mouthwatering taste of your Honey Roast Duck.
What to Serve with Honey Roasted Duck?
Enhance your culinary experience with these delightful pairings that balance flavors and textures beautifully.
- Wild Rice Pilaf: This fluffy, nutty rice dish adds depth and a pleasant chewy texture, perfectly complementing the rich flavors of the duck.
- Roasted Brussels Sprouts: The slightly bitter, caramelized edges of roasted Brussels sprouts offer a fantastic contrast to the sweet honey glaze.
- Creamy Mashed Potatoes: Luxuriously smooth and buttery, mashed potatoes provide a comforting base that soaks up every delicious drop of the duck’s savory juices.
- Tangy Orange Salad: A refreshing salad with orange segments brightens the meal with its zesty flavor, harmonizing seamlessly with the citrus notes of the duck.
- Garlic Green Beans: Sautéed green beans with garlic add a crisp touch, contributing a fresh and vibrant element to your plate.
Pairing these sides not only elevates your Honey Roasted Duck experience but also ensures a well-rounded meal that your guests will love!
Expert Tips for Honey Roast Duck
- Score Strategically: Properly scoring the skin aids in rendering fat and ensures a crispy texture; avoid cutting too deep into the meat.
- Drain Rendered Fat: Regularly removing excess fat every 30 minutes helps maintain a crispy base and allows you to save duck fat for other recipes.
- Avoid Burnt Glaze: Apply the honey glaze towards the end of cooking (15-20 minutes) to prevent burning while achieving a lustrous finish.
- Resting Period: Let the duck rest for 15 minutes post-cooking to allow juices to redistribute. This results in juicier meat.
- Use a Meat Thermometer: Aiming for an internal temperature of 165°F (74°C) guarantees that your Honey Roast Duck is perfectly cooked and safe to eat.
Honey Roast Duck Recipe FAQs
What is the best way to choose a duck for roasting?
When selecting a duck, look for a Pekin variety weighing between 5-6 pounds. Ensure the skin is intact and has a layer of fat underneath; this will help achieve that glorious crispy skin. A good sign of freshness includes a pleasant smell and no dark spots.
How should I store leftover Honey Roast Duck?
Store any leftovers in an airtight container in the fridge for up to 3 days. Make sure the duck is completely cooled before sealing it to retain its flavor and moisture. To reheat, pop it in the oven at 350°F (177°C) until warmed through to maintain its crispy skin.
Can I freeze Honey Roast Duck?
Absolutely! You can freeze your Honey Roast Duck for up to 2 months. Wrap it tightly in plastic wrap or place it in a freezer-safe container to prevent freezer burn. To thaw, place it in the refrigerator overnight before reheating in the oven for the best result.
What common mistakes should I avoid when making Honey Roast Duck?
One common mistake is failing to properly score the skin; this prevents fat from rendering out, leading to a greasy texture instead of that desired crispiness. Additionally, allowing the duck to rest for 15 minutes after cooking is essential for keeping the meat juicy. Lastly, make sure to apply the honey glaze towards the end to avoid burning.
Is this recipe suitable for people with allergies?
If you have allergies, be cautious with the spices and honey. Honey is not suitable for pets, especially dogs, so avoid sharing leftovers with them. The other ingredients are generally safe, but to accommodate gluten sensitivities, double-check any pre-packaged seasonings or use fresh ingredients.
How can I enhance the flavor of my Honey Roast Duck?
Experiment with different herbs like thyme or sage in place of rosemary for varied flavor profiles. You can also add some spices like cinnamon or ginger to the honey glaze for a unique twist. Lastly, serving your duck with sides like roasted vegetables or wild rice pilaf can elevate the overall taste, enhancing that sweet and savory contrast.
Irresistibly Juicy Honey Roast Duck with Crispy Perfection
Equipment
- Oven
- Meat Thermometer
- Butcher’s Twine
- Baking dish
Ingredients
For the Duck
- 1 whole Duck (Pekin variety, 5-6 pounds) The star of the dish
For the Glaze
- 0.5 cup Honey A natural sweetener that creates a glossy finish
For Flavor Depth
- 4 cloves Garlic Cloves Enhances aroma and flavor
- 1 whole Quartered Orange Adds fresh citrus note
- 2 sprigs Fresh Rosemary Elevates the dish
For the Spice Mixture
- 1 tablespoon Paprika Adds warmth and color
- 2 teaspoons Salt Essential for flavor
- 1 teaspoon Pepper Adds heat
- 1 teaspoon Garlic Powder Intensifies garlic flavor
- 2 teaspoons Dried Rosemary Alternative to fresh
Instructions
Preparation
- Remove the duck from refrigeration 30 minutes prior to cooking.
- Preheat your oven to 425°F (218°C).
- Gently rinse the duck under cold water and pat it dry with paper towels.
- Score the skin in a diamond pattern without cutting into the meat.
- Prick the skin where the legs meet the body.
- Stuff the cavity with garlic, quartered orange, and rosemary.
- Rub the spice mixture over the duck to coat evenly.
- Tie the legs together with butcher's twine.
Roasting
- Place the duck in the oven at 425°F for 15 minutes.
- Reduce the oven temperature to 350°F (177°C) and roast for an additional 75 minutes.
- Baste the duck with honey after 1 hour, then again 15 minutes before finishing.
- Check that the internal temperature reaches 165°F (74°C).
- Let the duck rest for 15 minutes before carving.
Notes


Leave a Comment